How to export photos from Lightroom
Exporting from Lightroom is a game of inputs and outputs.
That is, the sizes, resolutions, and file types you designate to a photo during the export process (input) will, in turn, dictate that photo’s storage real estate, visual appeal, and processing speed upon upload or print (output). For the average hobbyist, upload speed and quality aren’t even a second thought when it comes to developing, so long as your photo makes it to Instagram and begins drawing favor among your peers. However, for the career photographer who needs to deliver files quickly and meet the formatting standards of different media (be they print or digital), this article may just save you from dropping the ball.
For the sake of keeping things simple, let’s assume that I’m addressing DSLR and mirrorless camera users. Many of these models fall within the sensor sizes of about 24 to 36MP (megapixels), which makes export resolution size an easier topic to discuss. Getting into the details of exporting images from medium and large format digital cameras is a far more laborious task for another time. Instead, let’s run through the options on Lightroom’s export drop menu and consider what’s popular for most of the photographic community.
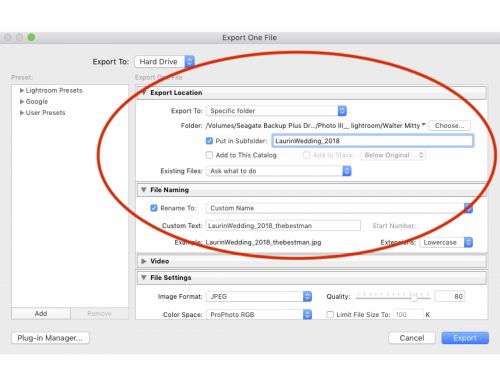
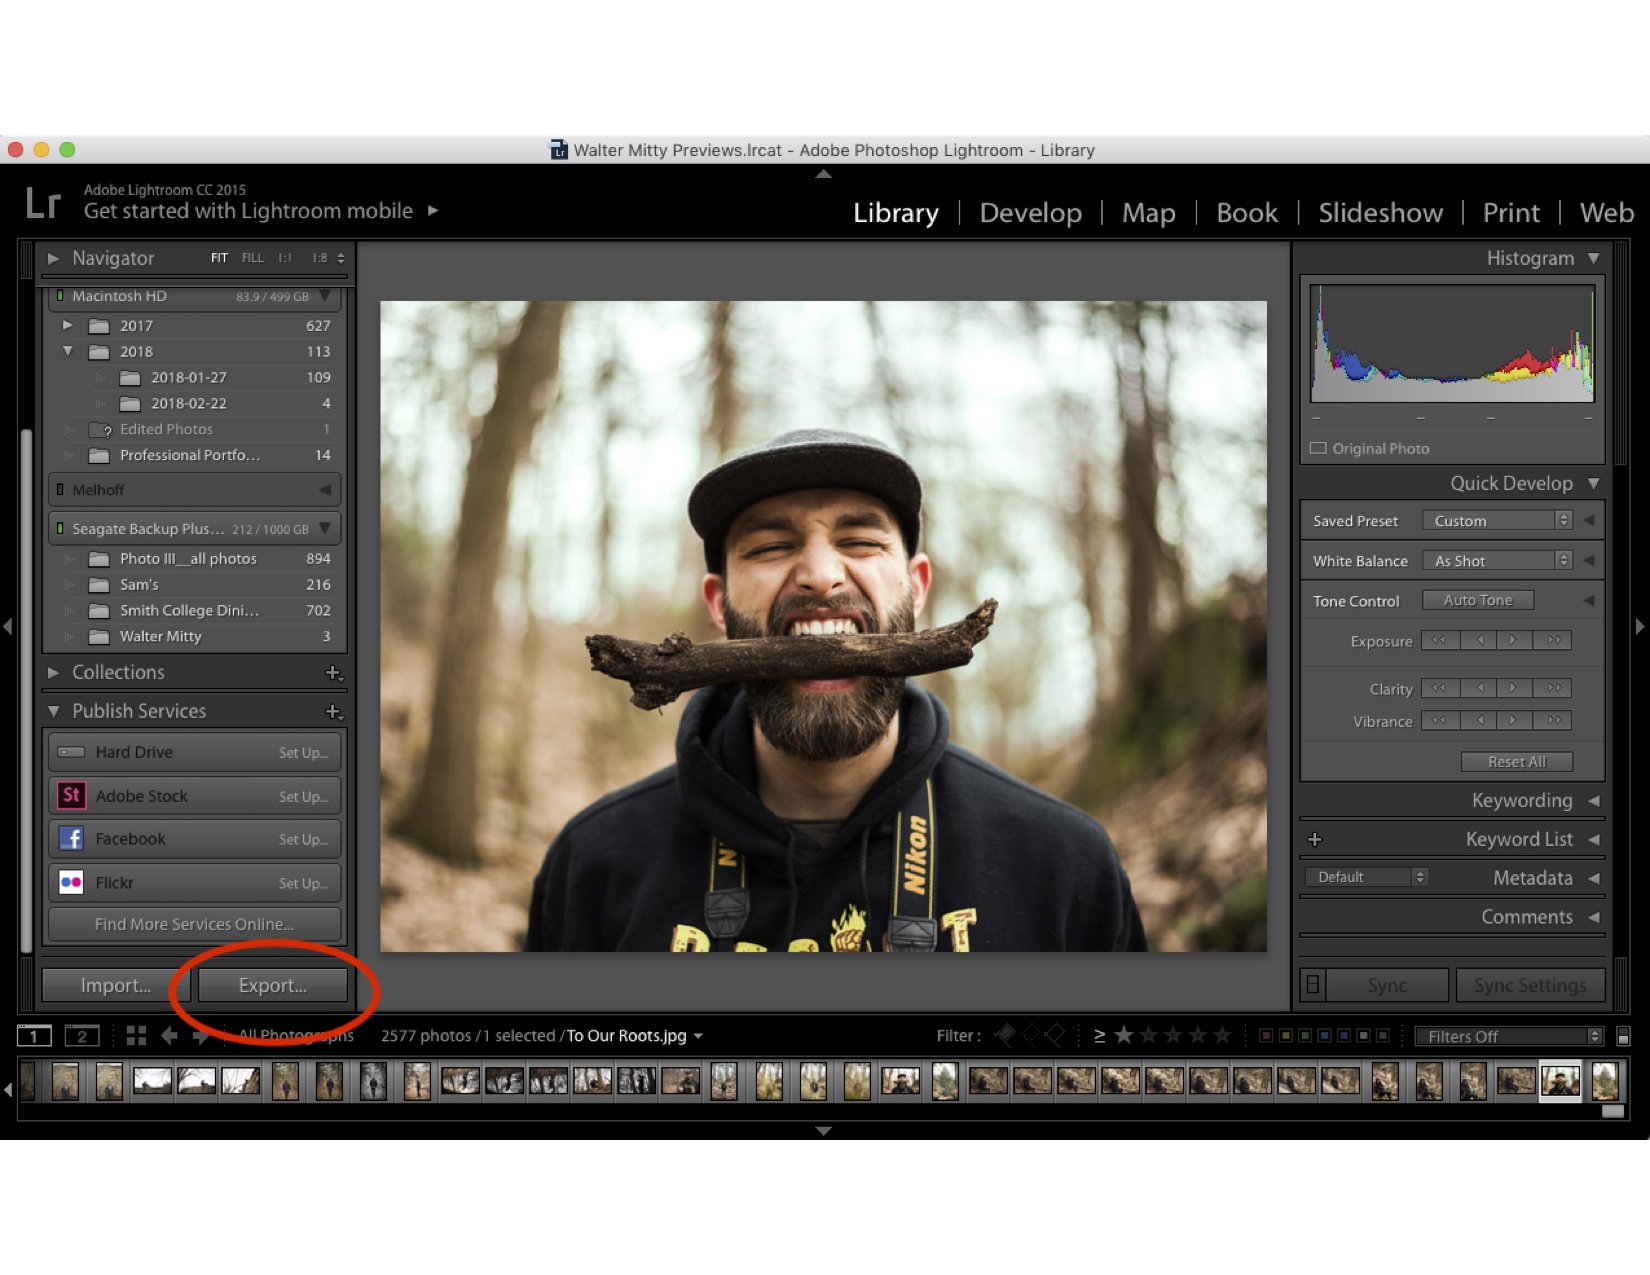
From the Lightroom main page, under “library,” click the export button on the bottom left hand side of the screen (or right click on the photo). Once, you are in the drop down menu, the first task you’ll have is to consider how easily you want to find your file after export. For finding photos post-production, the more granular you are the better. Give the photos a project title, underscore, and then the date (e.g. LaurinWedding_2018). You should later add it to a specific folder within your external hard drive’s catalog for Lightroom. Once you’ve designated a home and name for your photo, scroll down to 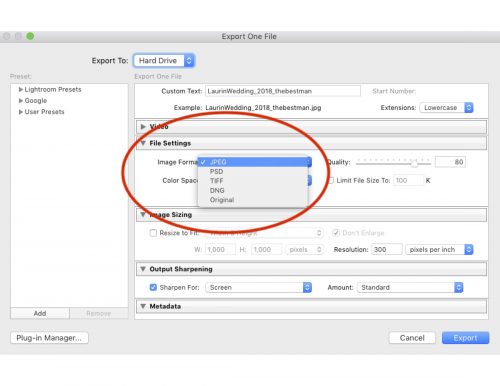
Now, the big question, what are you going to do with your photo? If the answer is, ‘print it,’ you won’t want to lose data in transit to your printer. Selecting TIFF (or TIF) file will be preferred in this case. This file format will save your editing metadata, whereas JPEG will flatten the image, making for a smaller file. And so, if the answer is, ‘export it online,’ you won’t want a long wait – skip the swirling color wheel and go JPEG. There are other options in this queue, but these are the most frequently used.
By this point, you’ve probably begun fiddling with the quality toggle, presumptuously sliding it towards that shiny “100,” unit value. I see you, stop. This isn’t the same as awarding yourself an “A+” grade for your work. No doubt, we all want to display our photos at their best quality, but it’s not that simple. The existence of such a toggle should indicate that 100 is a selection for special occasions. Most photos don’t need 100 percent original quality to look presentable online, or in print. Instead, remember this simple trick: increasing your image’s quality means making bigger large file sizes that take up more space on your computer or hard drive or cloud space. According to SLR Lounge’s Trevor Dayley, you can reduce file size by nearly 40 percent by going from 100 to 80 in quality, without noticing any aesthetic changes except, maybe, on incredibly large prints. Follow this same train of thought on your color space options. “sRGB,” is the smallest size and ditches most of your photo’s color data during export. If you’re done editing you may want to choose this. Otherwise, for photos intended for further editing in Photoshop or Illustrator, use “ProPhoto RGB.” The third option, “Adobe RGB,” is a nice middle ground between these two, and one I’m prone to using. If you’re neurotic about losing too much color data, like I am, choose this.
Finally, we find ourselves at image sizing, what seems to be quite possibly the most daunting choice on this menu. Don’t be afraid and don’t over think what appears to be a horrendous math problem. Kindly remind yourself that one megapixel is 1,000 by 1,000 pixels, an acceptable resolution for most media uploads. There was a time when some of the earliest digital cameras only shot 1MP (e.g. the Kodak dc210). If you need to be exact on your dimensions, set your resolution to 300dpi (dots per square inch) and try using 1,000 x 1,000 as a base. If the image is still too pixilated for your taste, try up-scaling to 2MP or 3MP, and so on, as needed.
The key here is, the bigger your print or digital display size, the larger your pixel ratios will need to be to accommodate. So, if it’s billboard print, expect to have a much larger width to height figure for your pixels. A much quicker option that answers most print and media orders is leaving “resize to fit,” and “don’t enlarge,” unchecked and just putting 300 within your resolution size. The parameters leading up to image sizing should save you enough space for you to make this choice, particularly if you want to give viewers the option to magnify on your site. Set at the same level of magnification, the two photos below demonstrate the resolution difference these choices can impose. It’s never a bad idea to select, “do not enlarge,” in order to prevent applications from automatically scaling your file to a larger size. Output sharpening is either going to be a choice here in Lightroom, later on in a third-party app, like VSCO™, or directly in Instagram and Facebook. I tend to side with my first photography professor, who advised sharpening at a standard amount in Lightroom, so you don’t have to do it later.

(Above: Image scaled 1,000 x 1,000 pixels at 300 dpi).
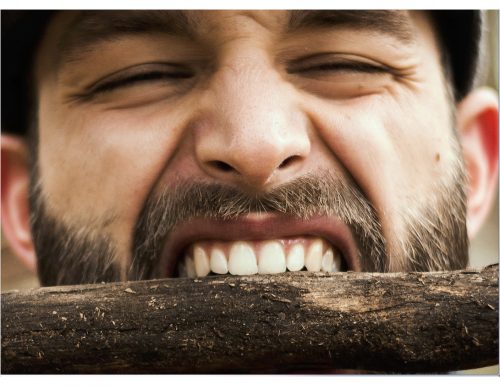
(Image left unscaled at 300 dpi).
The rest is up to you. Metadata can be easily extracted and manipulated these days. Adding a copyright can’t hurt, but it certainly won’t prevent others from recycling your photo for their own gains. Therefore, choosing external and cloud backups, creating virtual copies in Lightroom, and adding watermarks will simply make your case much stronger against this egregious act. While I admit scaling your photograph in “image sizing” can be a headache-inducing task, there are a number of short-cuts that will allow you to begin exporting more efficiently. If anything, I hope you walk away from this knowing you can save space on your laptop and upload more quickly while leaving the quality of your photos minimally tarnished.
- Emily Atkin is pissed off about climate change. Her new newsletter Heated says we all should be - October 1, 2019
- How to grow your brand as a photojournalist and commercial photographer - August 1, 2019
- Six digital skills all new journalists should consider learning and a road map to unlocking them - July 15, 2019


