How to convert a hand-drawn illustration into a digital graphic
The following is a tutorial on how to use Adobe Illustrator to convert a hand-drawn illustration into a digital graphic. More specifically, we will use Illustrator’s Image Trace function to convert a drawing into a vector image. A vector image is made up of a large set of points that can be infinitely scaled (up or down in size) without losing resolution.
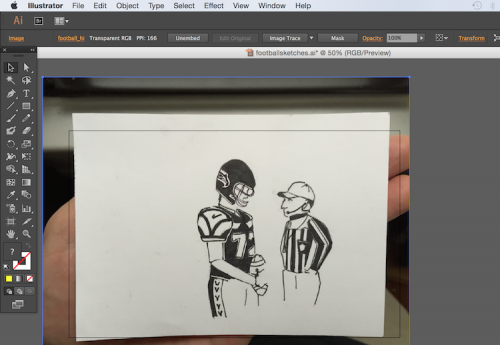
To start the process of preparing the illustration for web, take a high resolution photo (8.3 megabytes) with an iPhone 6. We didn’t have a scanner on hand.
Setting up the canvas
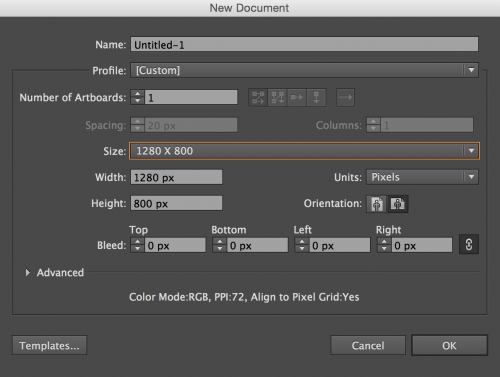
In Adobe Illustrator, open a new file with its profile set for Web, its size set to 1280 x 800 pixels, and its orientation set to landscape. This is a big enough canvas to create an image large enough to be set as a feature image on Storybench.
Upload the photo by clicking Place… in the File menu.
Cropping the photo
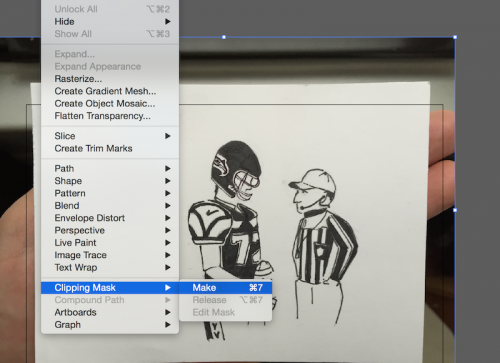
We want to use the Clipping Mask function to crop the photo and remove all the excess information that makes no sense to trace or even include. In the Object menu, click Clipping Mask and then Make.
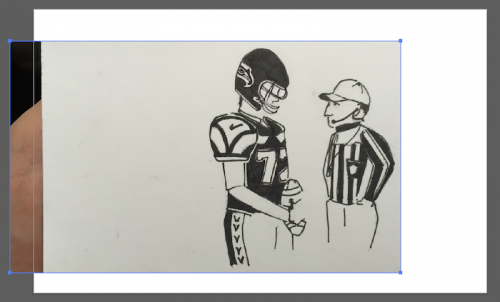
Then drag the borders to crop the photo.
Convert to grayscale and rasterize
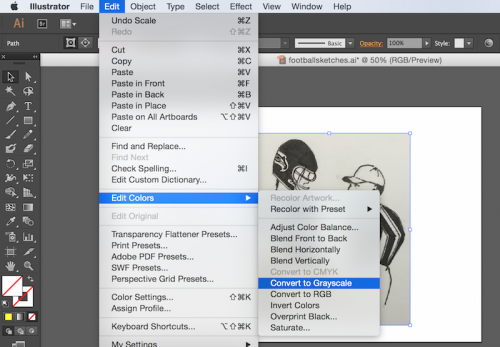
Next we convert the drawing to grayscale, which I am told makes it easier to trace by the Adobe Illustrator. In the Edit menu, select Edit Colors and then Convert to Grayscale.
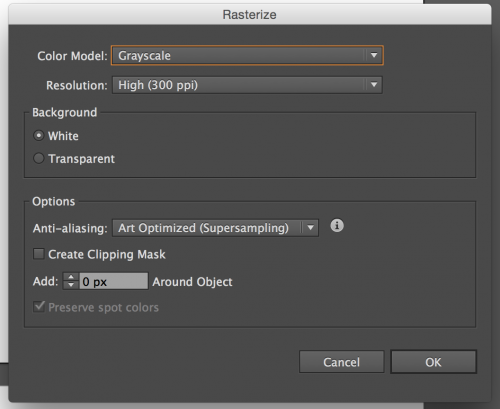
Next, rasterize the image so you can trace the image. Click Rasterize… under the Object menu. Select Grayscale under Color Model.
Tracing the image
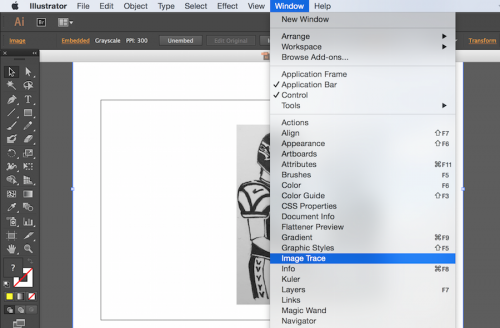
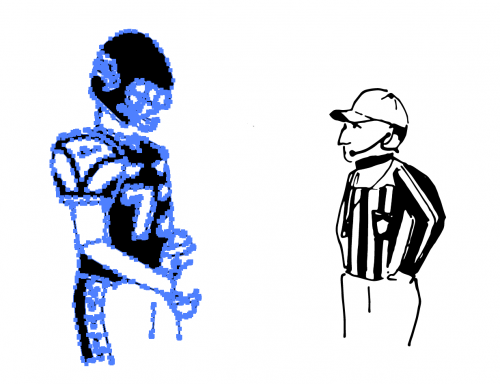
Now for the fun part. With the illustration selected, click Image Trace in the Window menu.
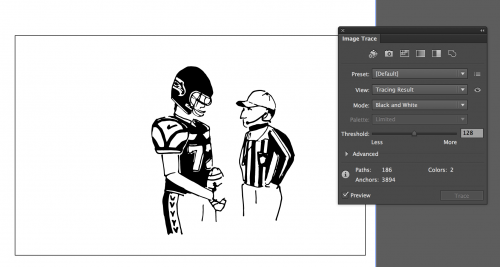
Next, click the checkbox next to Preview. By sliding the Treshold button you can make the lines thicker or lighter.
Next we want to convert the traced image into a vector, i.e. a set of points. Go to the Object menu, select Image Trace, and click Expand.

A closer look reveals the points that make up each piece of the illustration.

Ungroup the points
Next, we want to ungroup the points. This will allow us to move around individual elements or smaller subsets of points, like if we want to move the referee further away from the player. Select Ungroup under the Object menu. Sometimes you may need to ungroup several times.
We can also select subsets of points and regroup them. Once you’ve selected this subgroup (using the Shift key to help), click Group under the Object menu. Here we’ve moved the player away from the ref.
Adding color
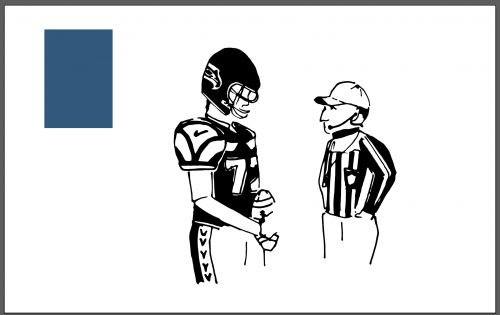
Since the football player was modeled after a Seattle Seahawks player, we decided to make him the Seattle Seahawks blue. To copy a color from an image, File > Place… a screenshot of the color on your canvas. (I took the screenshot from a Seattle Seahawks logo).
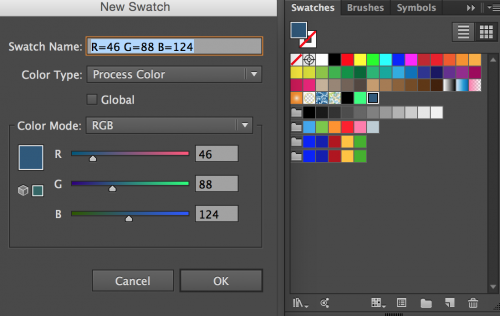
To make a swatch with this specific shade of blue, we want to open the Swatches box from the Window menu. Then, click the eyedropper tool in the left menu and click the screenshot of the color.

It will show up as the primary color in your swatch box. Click the New Swatch icon which is on the bottom-right, just left of the trash can icon. It will ask you to save the new swatch. Click OK. Now it will be saved on your list of color swatches.
Select the football player by dragging the Selection tool (or black pointer on the top left) across all the football player points. When the player is selected, click the new swatch you’ve just created. Voilá.
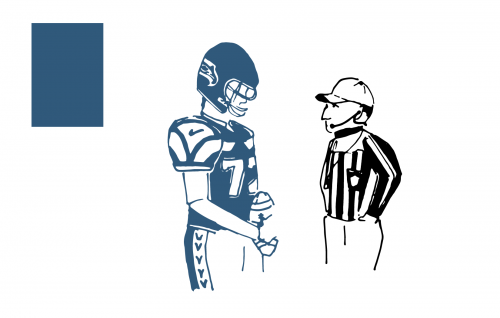
Delete the screenshot of the color and export your image using File > Export…
Some important options here. Make sure Use Artboards is selected to include the full canvas that you have been working on. If it is unchecked, the image exported will only be as tall and wide as the elements you’ve traced, i.e. the player and ref. Click Export. On the following PNG Options box, you have the option of selecting White, Black, Transparent or Other from the Background Color dropdown menu. Transparent is great for superimposing PNGs over other images.
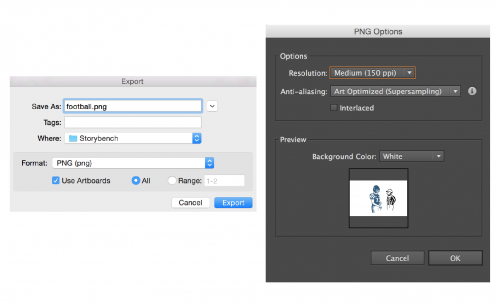
We chose white and ended up with this:
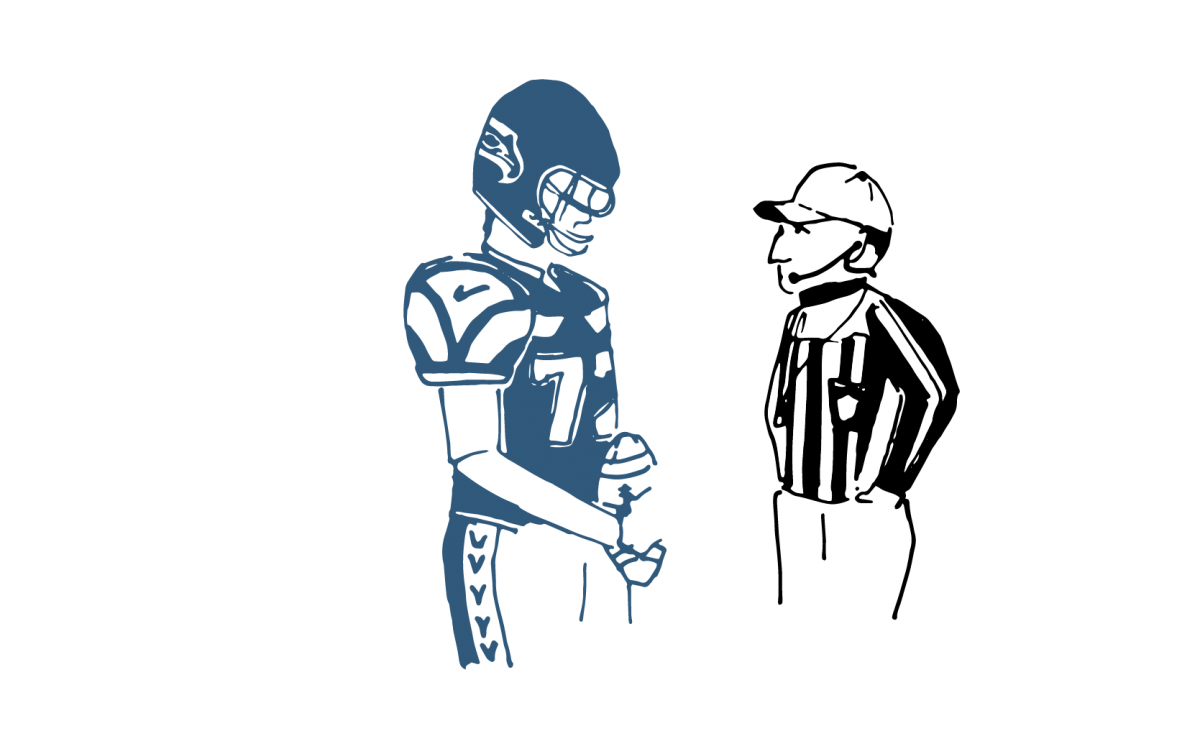
All images thanks to Luna Bajak.


Bonjour Aleszu,
That was so much fun to watch…I have a “hand drawn” design I need to convert to a graphic design for some merchandizing…
Hope this can handle it!
Thank you for your service and time!
Micheline D
Marina Del Rey CA
So glad I came across this. Will be giving it a go with some hand drawings I have that need to be digitally produced. Looks straight forward which I am glad about as digital drawing terrifies me.
Many Thanks
Penelope
This is great ! Thank you … Penelope you’re so funny … so am I …
Can you guide us this same process on some free to use softwares like inkspace or other it will be great for beginner like me.
Great information. How much does it typically cost to have this done?
Great article! Concise, clear & communicative
As a visual artist & author, this is exactly what I need to convert my hand drawn ink pieces into the digital space.
Thank you